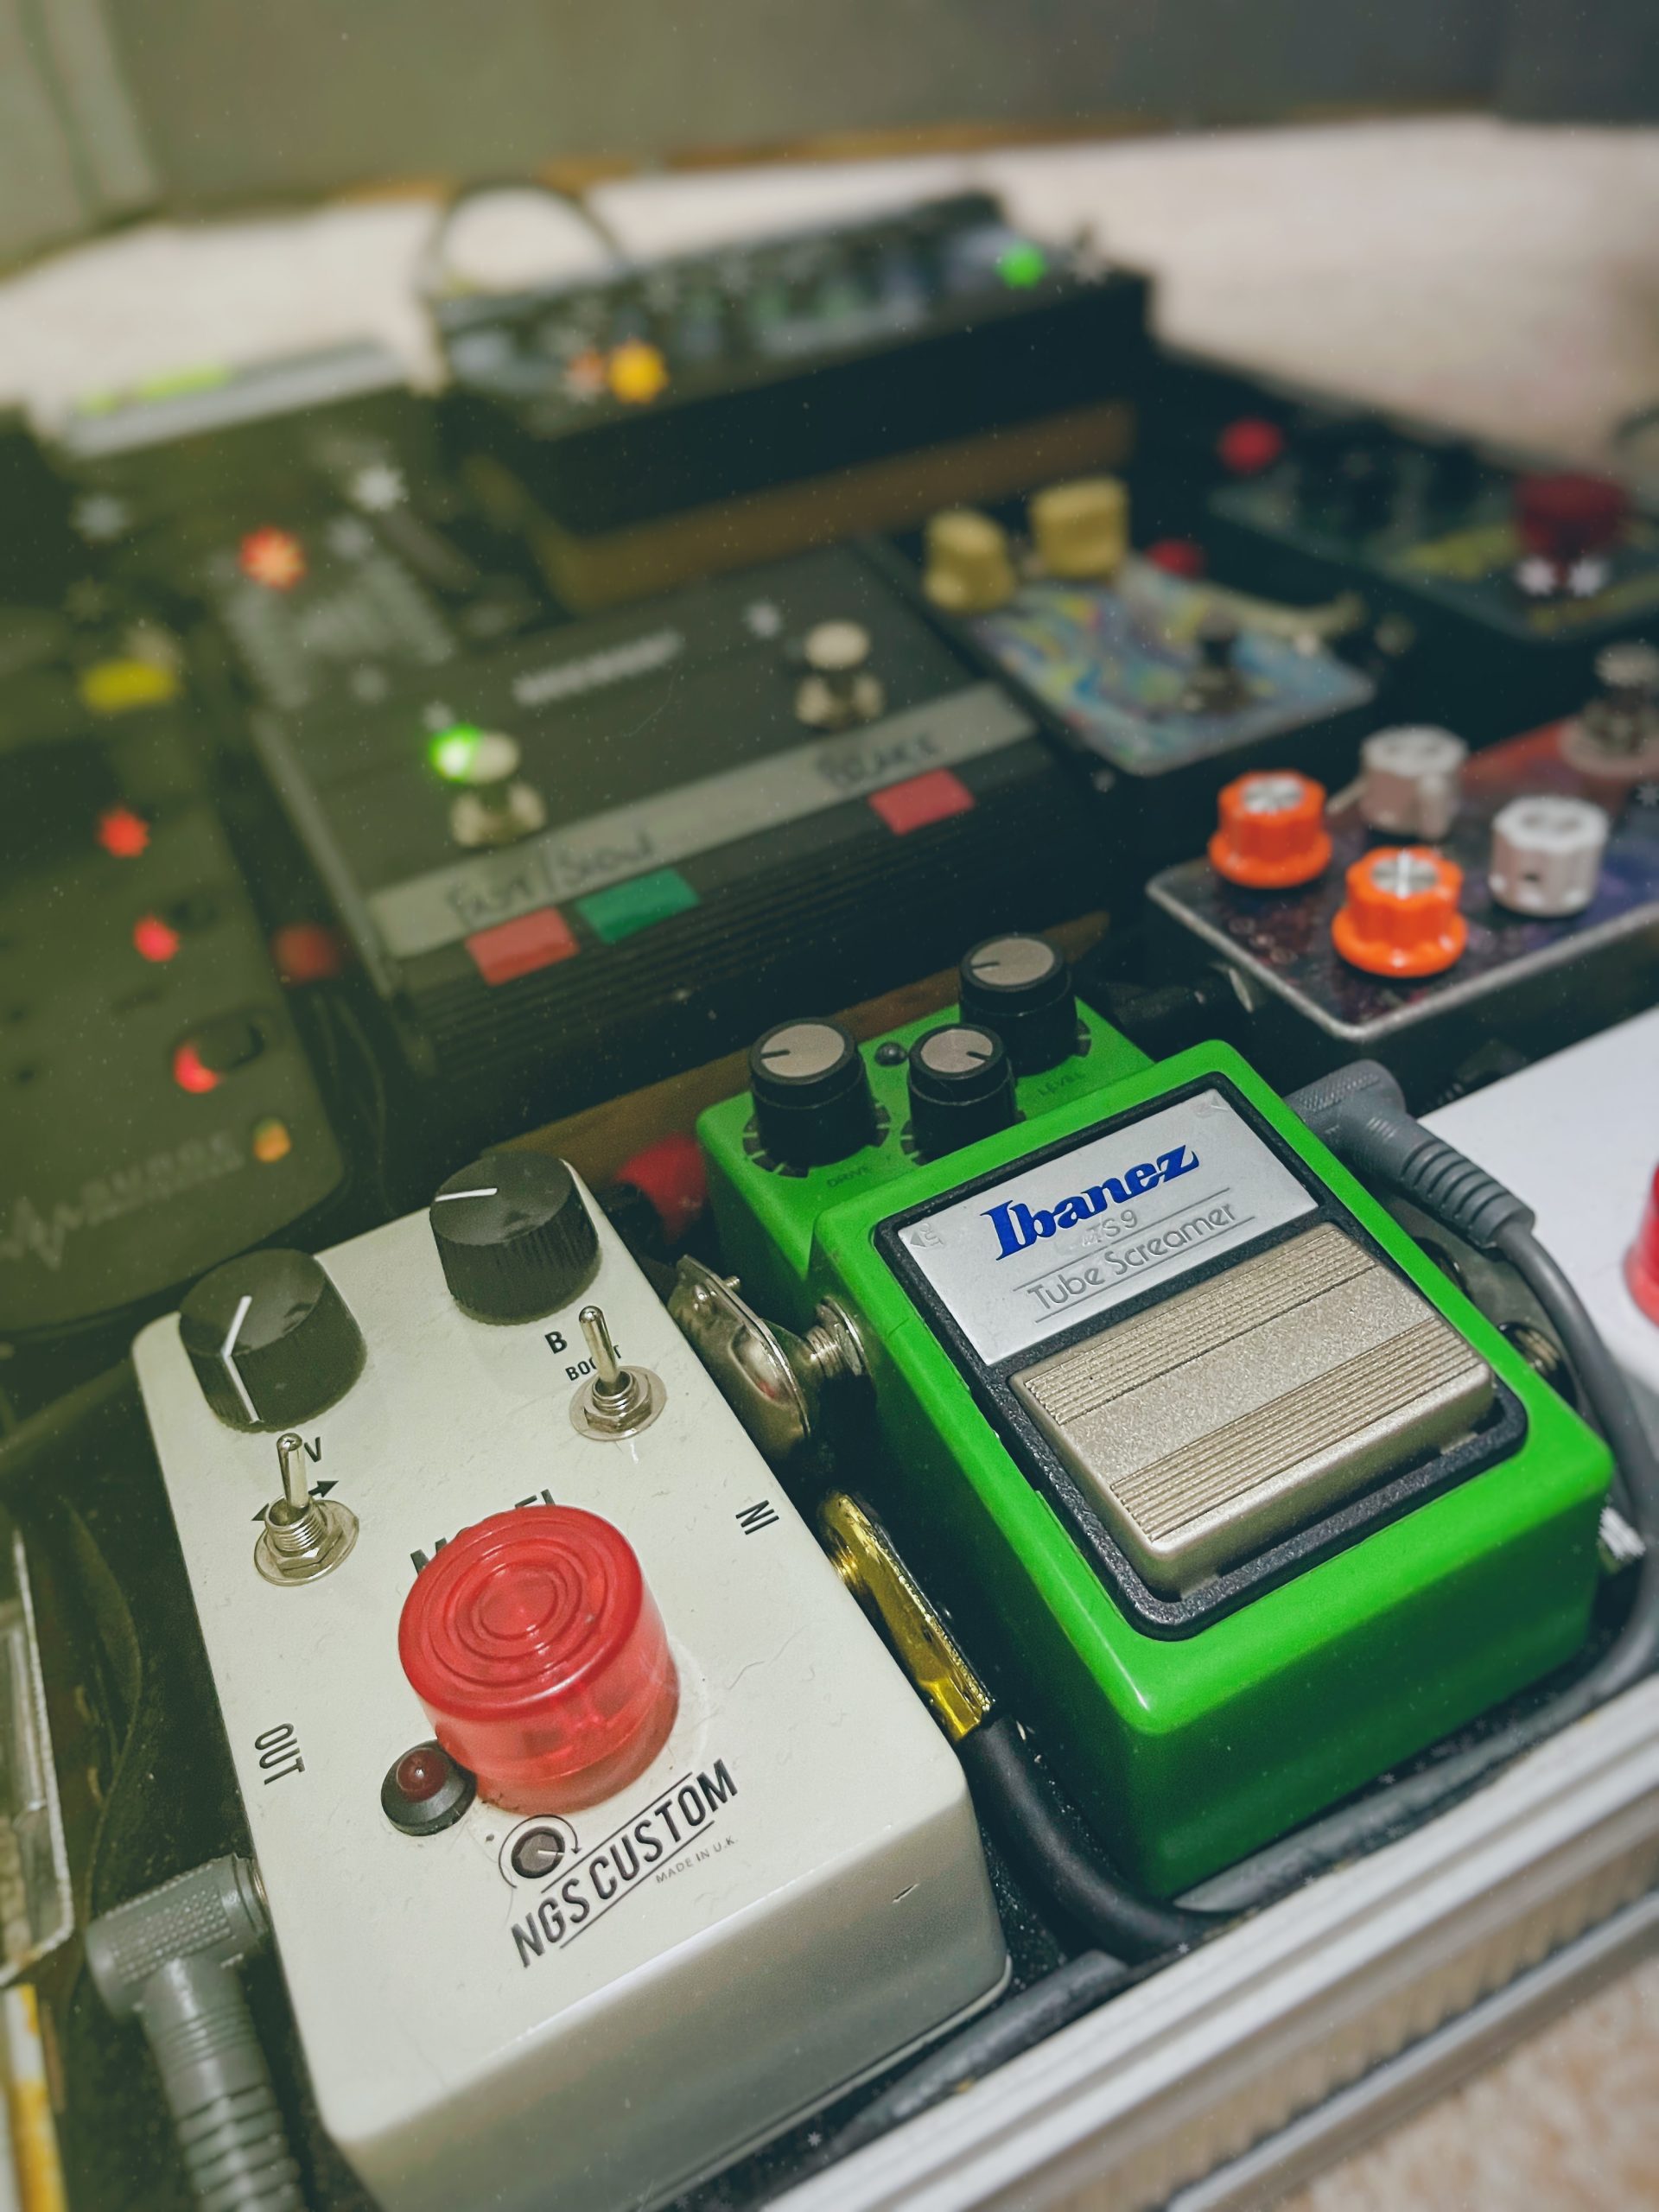
NGS Custom More Or Less and Ibanez Tube Screamer TS9
Pedalboard Cable Routing
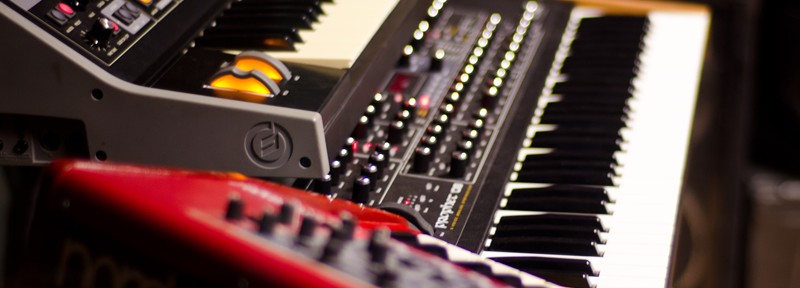
This is something I get asked about from time-to-time… I know you don’t commonly see keyboard players using boards of effects pedals, like guitarists often do, but I have put a lot of thought into the setup I’m using on my gigs and I feel like this rig fits my workflow and my approach to my playing well.
I enjoy using tactile pedals to add or remove layers of sound ‘in the moment’, shaping the tone of my playing to fit the contours of the song; I have tried to build something which allows me to achieve a wide range of sounds on the fly, whilst keeping load-in and setup easy and convenient.
Check out the video for a full ‘rig rundown’ of the setup I’m using on my gigs at the moment.
Click here for a full break-down on my custom rotary speaker speed-switcher pedal, as mentioned in the video.
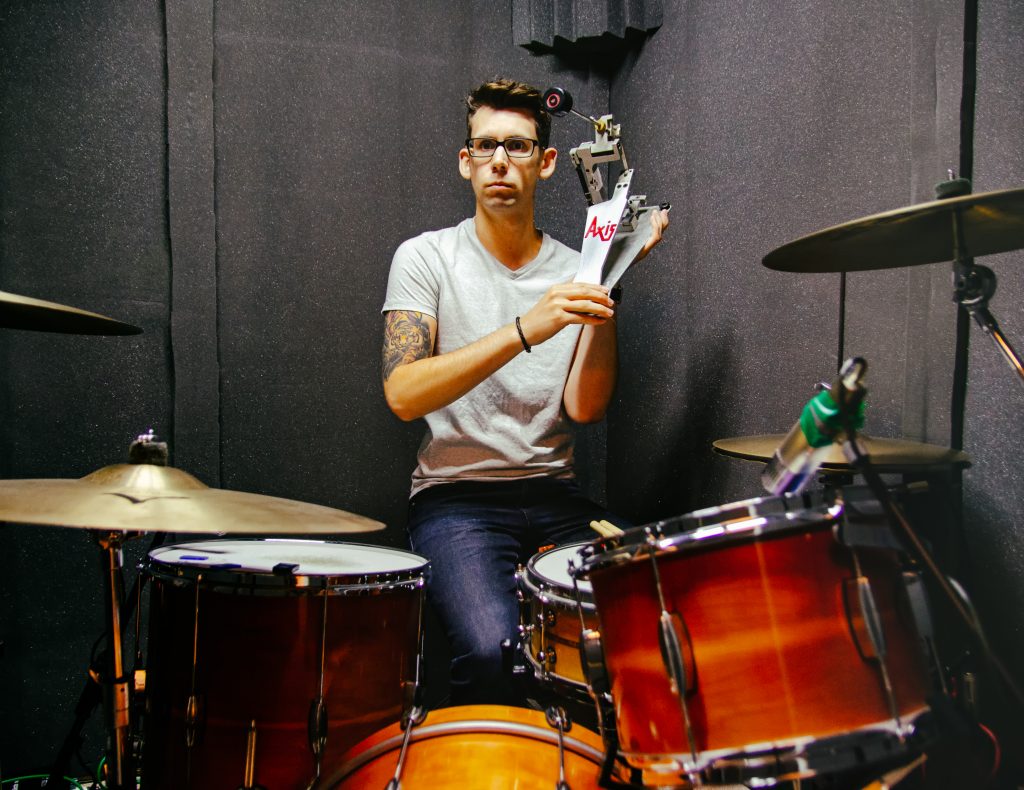
Axis bass drum pedals and hihat stands have been been my number one choice for years. For me, the build quality and the responsiveness of the direct-drive mechanism Axis use are second-to-none.
As a session musician playing a lot of live gigs every year, I need to have absolute confidence in the quality and reliability of the equipment I use – especially pedals, which take a big beating on every show. Even with the rigours and stresses of regular touring – traveling around the country and loading in and out of different venues all the time – I know that Axis pedals won’t let me down on the road, and that my feet will feel fully connected to the drumkit when I am onstage. I still regularly gig with the very first Axis pedal I ever bought, over ten years ago, and it feels just as comfortable to play on as it always has.
In the studio, the smoothness of the pedal action and the quality of the components mean that I always get the consistency of tone and the lack of extraneous pedal noise which my remote recording clients expect from my playing.
Over the lockdown period I have enjoyed some extremely productive discussions with the guys at Axis, and I am very honoured to be able to announce that I am joining the Axis Percussion artist roster this summer. I am proud to be associated with a brand whose products I have relied upon for so long, and to represent Axis Percussion as one of their artists.
In November I achieved a small dream of mine, as a keys player – I bought a genuine old vintage rotary cab for gigs and sessions where I’m mainly playing Hammond organ-type parts. My studio setup has evolved so that I try to stay away from emulators, and capture the sounds of real hardware and genuine components, wherever possible. So to be able to record and play live with a real rotary speaker for that sweet bluesy organ tone was a really exciting prospect for me.
The speaker I got is a Sharma 2000 – Sharma was a British firm which was a competitor to the famous American Leslie cabs during the ’60s and ’70s. It maybe a lesser-known brand, but the Sharma speaker still sounds just like the organ tone I’ve always wanted from my playing, and put a huge grin on my face from the first moment I sat down to play organ through it. (I’m playing it from my workhorse Nord Stage 2 keyboard setup as a B3 emulator – you can’t avoid emulators altogether! – but with the Nord’s built-in rotary function switched off.)
The Sharma speaker has the same 9-pin Amphenol connector you get on Leslies which carries input signal, volume information and various other program-change style controls. But unlike Leslies, the Sharma also has a ¼” jack line-level input and separate volume and bass/treble tone pots… So because the Nord Stage doesn’t have an Amphenol output (and the cables seem quite expensive!) I just used the line-level jack input and left the Amphenol well alone. Until I wanted to change the speed of the rotary motor inside…
When you use the rotary emulator in the Nord, you can switch from the slow setting to the fast with a latch pedal. I use a basic Yamaha sustain pedal (the FC5) for this, and I can just stamp on it each time I want to change the rotary speed. But that is plugged directly into the keyboard, so with only the line-level output going from the Nord to the Sharma speaker there was no way for that pedal to control the speed at which the physical motor inside the Sharma cab was spinning. So I thought I’d open up the Sharma 2000 and have a look around, to see how the speed of the motor could be controlled.
Nord Stage 2 And Sharma 2000 Onstage In Soundcheck At Epic Studios, Norwich
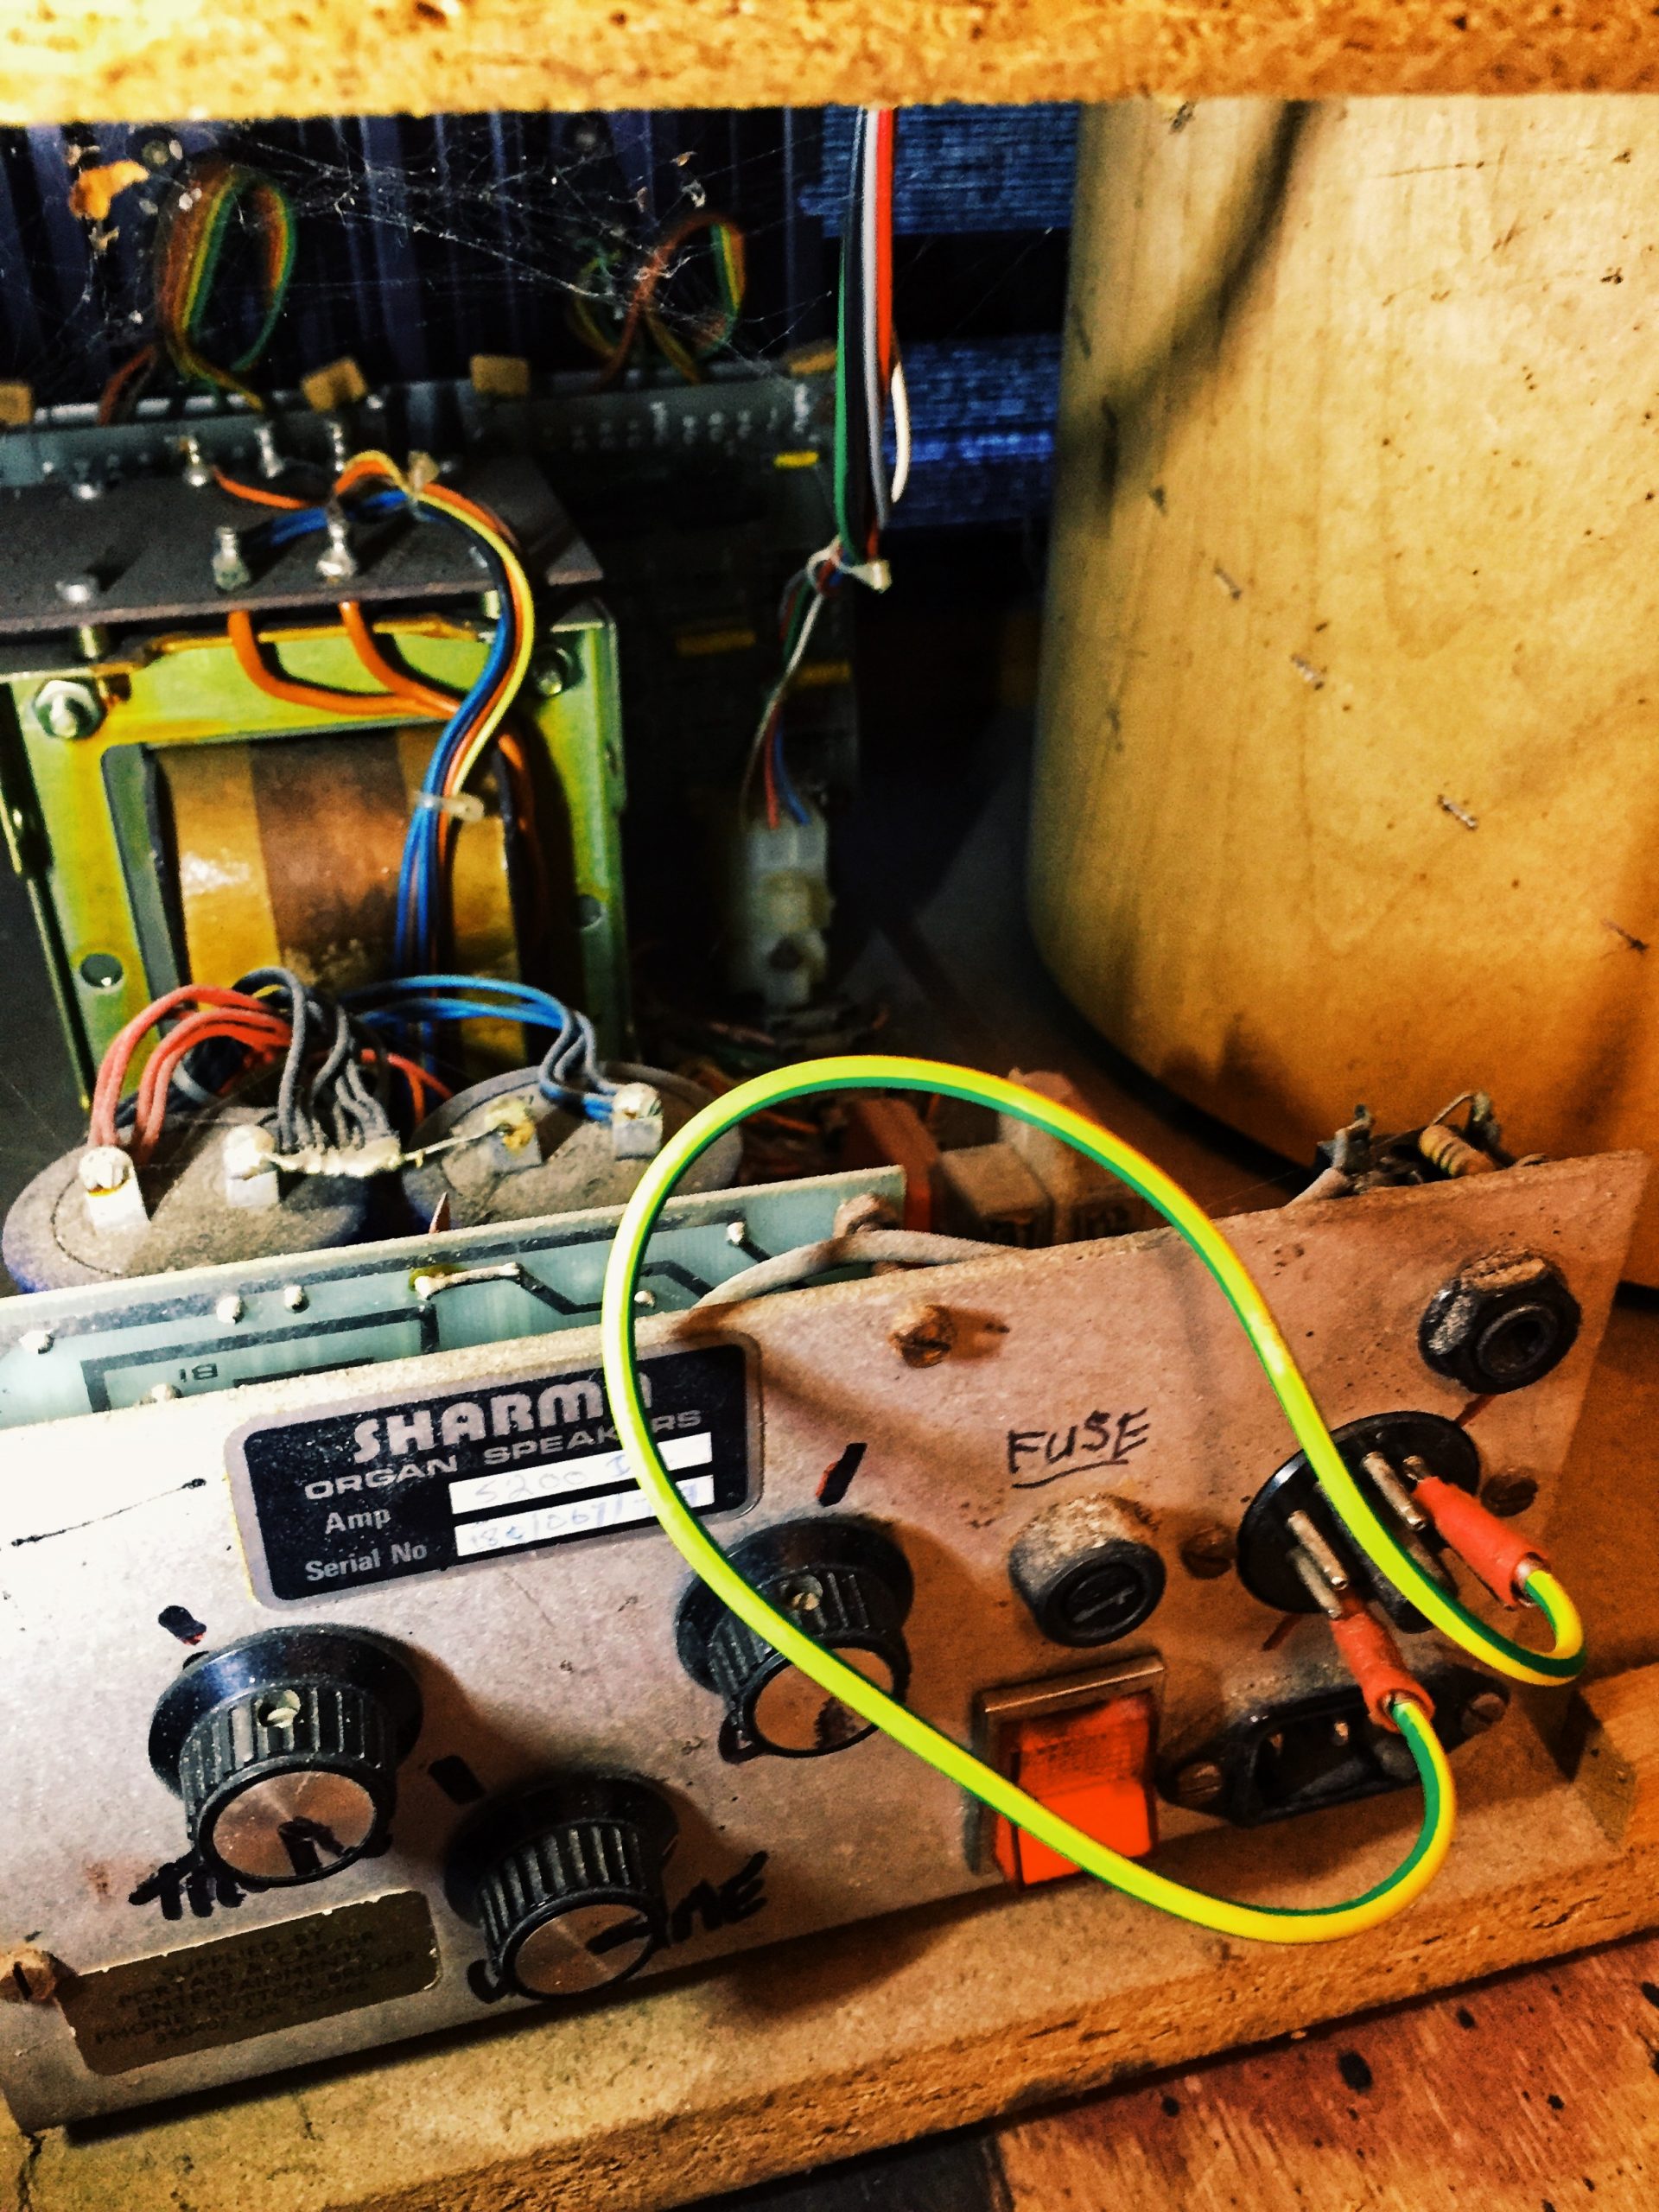
Inside The Sharma 2000
At this point, I wasn’t even sure whether you could change the speed of the motor at all; barring a skeletal Wikipedia article, I could find nothing about Sharma as a company online nor any documentation about any of their products – maybe, unlike Leslies, the Sharma rotary cabs had been built with only one possible motor speed? But I thought this unlikely, since they were designed to be competitors to Leslies, so I went exploring.
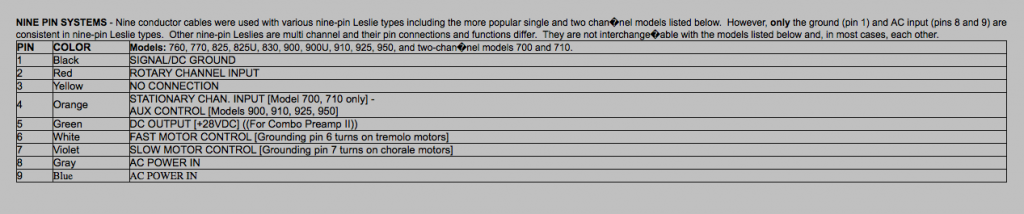
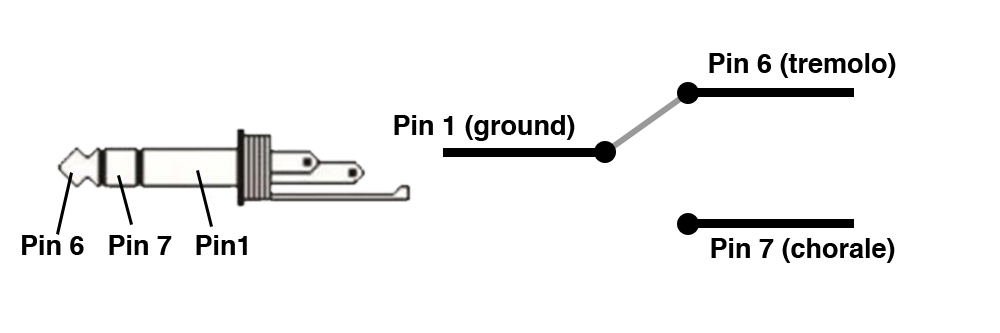
My first step was to find out more about the 9-pin Amphenol connectors, and what they could do. If it were possible to change the motor speed whilst the speaker was in use, it would be controlled from there – probably one of its pins carried information for rotary speed. Since the Sharma was designed to compete with Leslie cabs – for which there is a lot of documentation, not to mention a thriving online community, available – I went in search of a wiring pin diagram for Amphenol connectors used in Leslie cabs.
Typically for older engineering, it appeared that there was no standardised way to wire Amphenols for rotary speakers, and there were even variations in the numbers of pins used (some Leslie speakers being fitted with 5-pin, 6-pin, 11-pin or 12-pin versions of the connector instead) – but Uncle Harvey’s Guide To Leslie Pin-Outs proved invaluable, and I settled on a ‘most likely’ 9-pin configuration which suggested that grounding Pin 6 would result in a fast (‘tremolo’) rotary speed, whilst you grounded Pin 7 for the slow (‘chorale’) setting. The ground pin is Pin 1 – which explained why my Sharma had arrived with Pin 1 manually hardwired to Pin 6 with a small length of earth wire and a couple of cable crimps.
Common 9-pin Amphenol Wiring Configuration In Leslie speakers
I ran a couple of quick tests, manually removing the cable crimped to Pin 6 and attaching it instead to Pin 7… And, success! The motor rotated slower, for the ‘chorale’ setting. I reattached the cable to Pin 6, and the motor sped up back to ‘tremolo’ speed. But I can’t get up from the keys mid-track, go round to the back of the speaker to fiddle with a little piece of wire every time I wanted to change the organ sound; now the challenge that remained was to be able to control this change from a footswitch whilst playing a song.
It was clear that I needed a pedal which could route a single source (ground) to one destination (Pin 6) to another (Pin 7) and back again. So unlike the momentary switching configuration of the Yamaha FC5 pedal I had been using to control the speed of the internal rotary emulator in my Nord Stage, this would need to be a single pole, double throw latching switch. Luckily this is the type of switch used in most standard guitar amp channel switching pedals – so I bought the cheapest generic guitar amp footswitch I could find which also had next-day delivery on Amazon, in the hopes of modifying it to suit my purpose in time to be able to use the Sharma 2000 (with a rotary speed switching pedal!) live on Sam Coe’s Comeback Queen album launch gig two days later.
Sharma 2000 Rear Input/Control Panel With Pin 1 Crimped To Pin 6
Generic ‘Neewer’ Guitar Amp Channel Switch
Drilling New Housing For ¼’ TRS Jack Input Socket
My cheap generic footswitch (a ‘Neewer’-branded one with a pretty standard design) arrived the next day, and I opened it up to take a look at the wiring and see how I could adapt it to suit my needs. This pedal actually has two single pole, double throw switches wired to a ¼” TRS jack socket (one for each channel on a guitar amp), but I was only going to use one of the switches as I wanted to be able to stamp on the pedal in the same place all the time to change the speed without worrying about which switch was for ‘tremolo’ and which switch was for ‘chorale’. (A classic Hammond organ setup would utilise the second switch as the ‘brake’ function – ie. stopping the motor spinning altogether – but this wasn’t a priority for me as it’s not a function I use much in my playing, so I left it blank and focused on what I needed for the show in a couple of days’ time.)
As the Neewer pedal used a TRS jack socket to send its information – and came with a TRS jack-to-jack cable included – I needed another jack socket on the Sharma for the speed switcher input. Luckily I had some spare TRS sockets left over from another project, so I was able to just drill out a housing for it in the blank space on the panel at the rear of the cab next to where the other inputs and controls sit.
I re-soldered the wiring inside the pedal so that the single pole of switch number one was connected to the sleeve of the TRS socket, and the tip and ring were connected to one of each of the throws, then matched this on the TRS socket I had added to the panel on the rear of the Sharma speaker by soldering the sleeve to the earth wire crimped onto Pin 1, and removing the wiring the cables from the back of Pins 6 and 7 to solder one each to the tip and ring connectors, as per my wiring diagram below.
Wiring Diagram For Rotary Speed Controller Footswitch
And all that was left to do was test it. See my YouTube video below for the full process and the final result!
And make sure to check out the video of Comeback Queen – the title track from Sam Coe’s debut solo album – live at Epic Studios in Norwich to hear the Sharma 2000 in action on a gig.
Recording samples of real analogue bass synth sounds from the iconic Moog Voyager and Moog Little Phatty synthesizers in the studio last night, for use in live shows and sample packs.
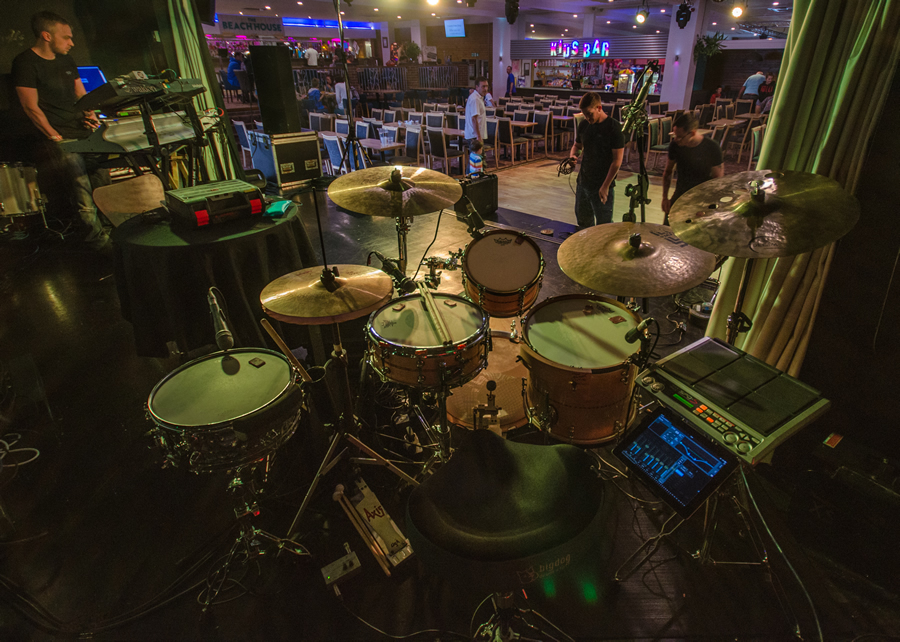
I wanted to write a little bit about the gear I am using on the road with live ’90s dance music show Ultra ’90s this summer, and share some of the reasoning behind why I’m playing this setup and why it suits this show so well. Here we are in setup at Golden Coast in Woolacombe, Devon, from behind the kit:
Ultra ’90s at Golden Coast
The kit I’m using is my Carrera custom ‘Sound’ kit with an 18×14″ bass drum and 10×6″ and 14×10″ toms; it’s perfect for touring, as it’s small and lightweight (which helps in reducing the strain on the stalwart Ultra ’90s van which has to carry to the entire rig from place to place!) thanks to the thin birch shells, but the toms still have good projection despite their shallow depth. The toms are also close mic’ed with Sennheiser E604 drum mics. The bass drum is fitted with a mesh head, and all the bass drum sounds are triggered with a Roland RT-10K, going into an Alesis DM5 module.
I’m using two snare drums here – my 14×5.5″ steambent maple Carrera Tunkan Ingan prototype is my main snare, but I also have a 12×5″ Mapex hammered steel snare as an auxiliary snare. This drum is tuned up very high and snappy, and it also has a Roland BT-1 trigger bar on the rim; this triggers a massive dance music clap sound from my Roland SPD-S. There’s often little variation in dance music drumming, so all the contrast and interest in the parts comes from adding and taking away layers of sound; playing a rimshot on the auxiliary snare means I can layer an electronic clap with an acoustic snare sound with one hand, and still be free to play the hihats or the ride cymbal with my other hand, so I can switch to this from my main snare going into a chorus or anywhere where the track feels like it needs to ‘lift’. Both snares are mic’ed with Shure Beta 57s.
The SPD-S itself (on the right, next to the floor tom) I use to trigger various samples – as well as the electronic snare and clap sounds, I have rising sweeps and bass sub drops to use when appropriate in the music. Also on the same stand is my iPad, which is running Presonus UC Surface – a remote control app which communicates with the mixing desk for the show via a closed local WiFi network. The whole show is run to a click track, so being able to have full control over my own foldback mix for my in-ear monitors directly from the iPad is fantastic! I use ACS T3 in-ear monitors; playing sets of (sometimes) up to two hours without breaks, I really appreciate the T3s’ clarity of sound, and the comfort in my ears.
I like to vary the cymbals I use quite often, so I don’t always have an identical cymbal setup to this. I quickly get bored of using exactly the same configuration of cymbals every night, so it’s fun to switch things up every so often and get different sounds out of the kit. The combination of cymbals in this picture, however, is one I really like and have been using quite a bit recently…
The hihats are 14″ Paiste 2002 Sound Edge hihats, which are great for this type of gig as they are bright and cutting with a lot of definition. The main (left) crash is a 17″ Paiste Signature full crash – it has a bright, glassy crash sound which really cuts through the mix (even with all those layers of synths!), but it’s also great for sensitive washes on quieter sections and build-ups. The ride is a very new acquisition, but one I’m really liking – a 20″ UFIP Bionic ride, with lots of stick definition without being too ‘gongy’ and overpowering. The second (right) crash is rather an interesting one; starting out life as an 18″ Dream Contact crash/ride, it has been modified and repaired by the very talented Benjamin Camp at CymbalMagic into an explosive, trashy ‘effects’ crash with dark and complex tones – it’s great for accents, and introducing a bit of contrast into the sound of the show. All the cymbals are nicely picked up by the overhead mic, which is an SE Electronics SE4a.
On this show, I also use Pellwood Rock Classic Short sticks and Axis X-series pedals – both of which feel just right, and are comfortable for playing for long periods with no breaks, without getting tired.
The Ultra ’90s gigs are always really fun, and touring with these guys is something to which I really look forward; having the right gear to take on the road makes sure I can always do my job to the best of my ability, and put on a good show for the crowds every night.
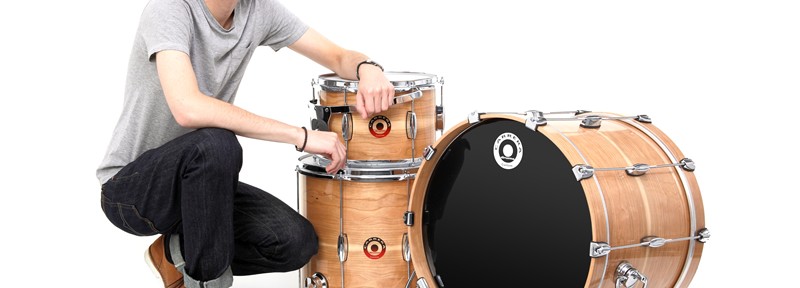
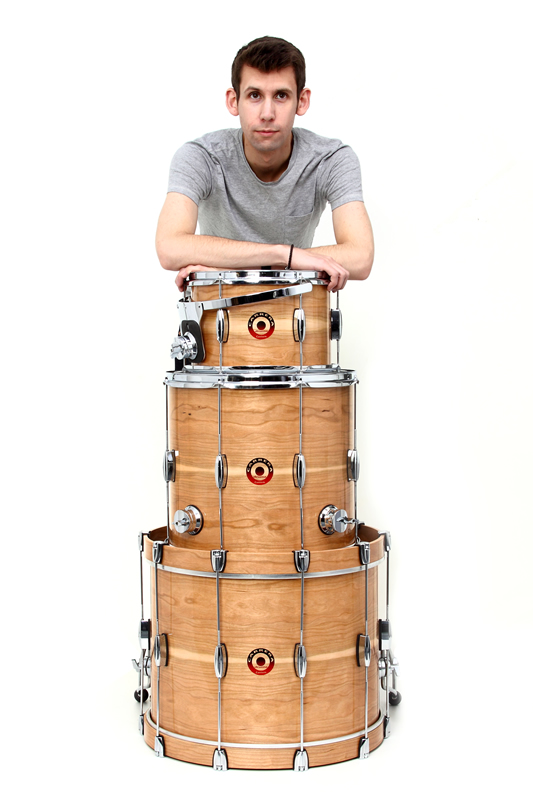
As most people will know, I have been a proud ambassador for Carrera Drums since the start of 2011, and have been honoured to play their drums and be involved with the company for the past four years. Everywhere I go – on live shows and in recording studios – I get compliments on my Carrera gear from artists, from other musicians, and from engineers and producers.
Sadly, however, Carrera Drums is winding up in spring of this year, and will cease trading as of the end of March. This is the official announcement from the Carrera Drums website:
It is with the deepest sadness that we have to announce that Carrera Drums will stop trading as of the 31st March 2015.
Dave Carrera has fought serious health issues over the last 3 years which have now deteriorated to such a level that he has decided to focus on attempting to recover or stabilise his condition which, even with good extraction, a dusty workshop hinders.
We have all had fun making some fine instruments for some of the finest drummers active today and want to thank everyone for there support, kindness and love over the last 5+ years.
Any works currently in progress will be completed and shipped before end of March 2015 and customers have been notified.
We are also selling all tools,stock and items via our eBay page, search for Carrera Drums, but welcome direct emails to info@carreradrums.com with sensible offers for our drum shell making molds and tooling which if agreed to, must be collected by end of March 2015
Again, thank you to everyone who has helped us over the years and we wish you all every success in your futures.
Yours sincerely
The Carrera Drums Team
Carrera Drums website
For my part, I am gutted to see Carrera Drums end in this way; their extraordinary attention to detail, high-quality craftsmanship and innovative way of thinking will be sorely missed in the UK drum building scene, and by the musicians who use and work with their products. Of course, the health of Dave Carrera – whom I am lucky to consider a friend – is the most important thing, and I fully respect his decision – which can’t have been at all easy – and the reasons for it. I will continue to use my Carrera Drums live and in the studio, and will be very proud to keep flying the flag for this amazing, ground-breaking company.
This website uses cookies to improve your experience. We'll assume you're OK with this, but you can opt-out if you wish. Cookie settingsACCEPT
Cookies Policy
Privacy Overview
This website uses cookies to improve your experience while you navigate through the website. Out of these cookies, the cookies that are categorized as necessary are stored on your browser as they are essential for the working of basic functionalities of the website. We also use third-party cookies that help us analyze and understand how you use this website. These cookies will be stored in your browser only with your consent. You also have the option to opt-out of these cookies. But opting out of some of these cookies may have an effect on your browsing experience.
Necessary cookies are absolutely essential for the website to function properly. This category only includes cookies that ensures basic functionalities and security features of the website. These cookies do not store any personal information.
Any cookies that may not be particularly necessary for the website to function and is used specifically to collect user personal data via analytics, ads, other embedded contents are termed as non-necessary cookies. It is mandatory to procure user consent prior to running these cookies on your website.